Step 1 – Create a Spring Boot application and add dependencies.
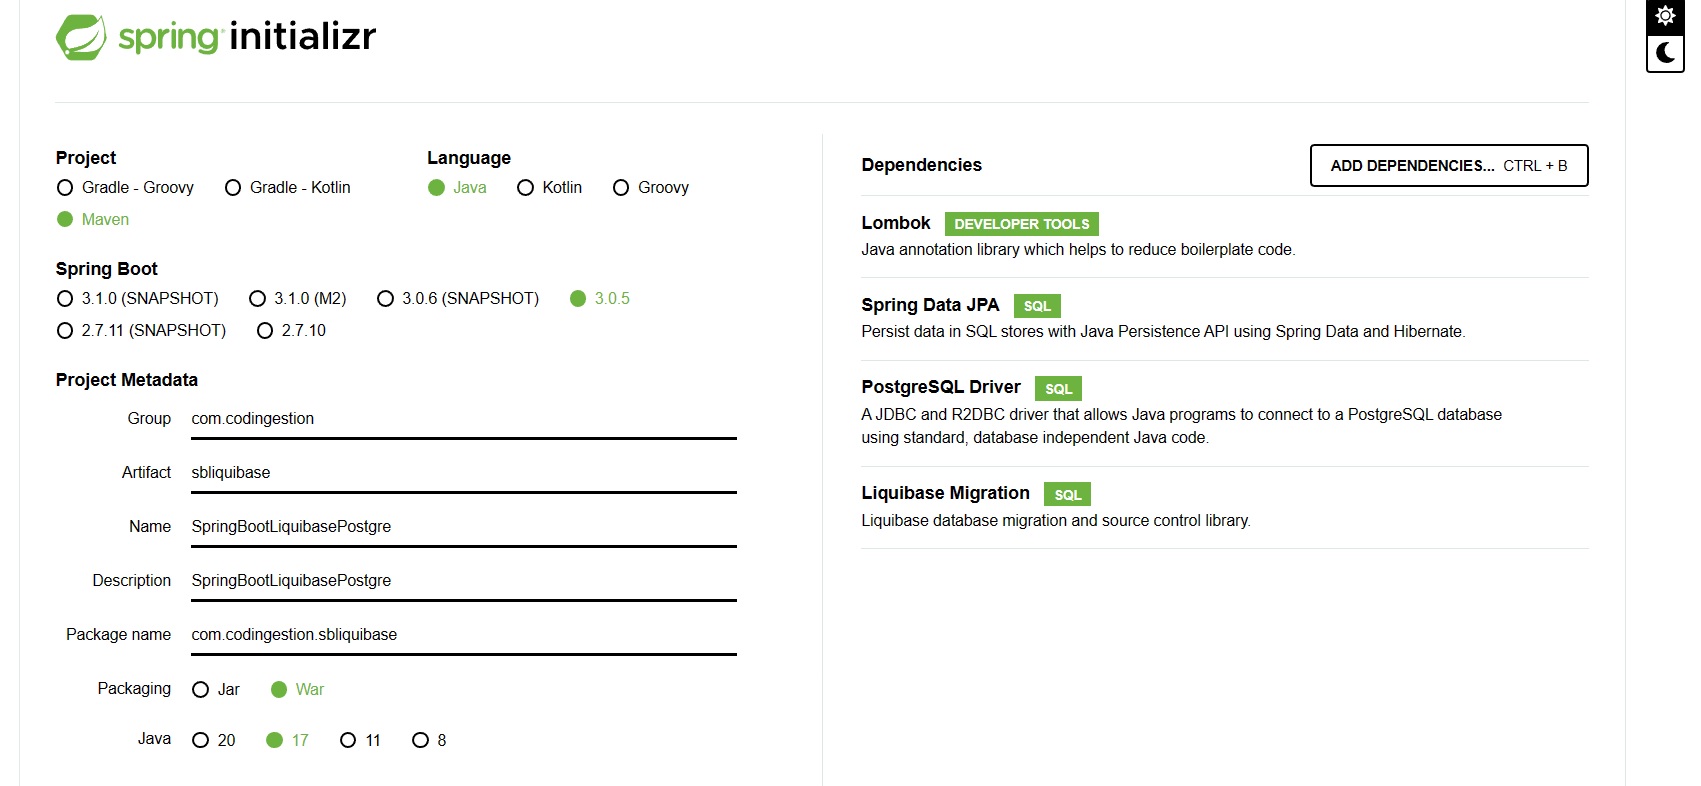
In order to setup Spring Boot Liquibase with Maven, we need to access Spring Initializr and configure a few options like in the image below.
We will use Lombok for reducing the boilerplate code like getters and setters in our model classes. Spring Data JPA will allow us to use Hibernate for performing reads and writes from the database without writing manual queries. I used PostgreSQL in order to demonstrate how to create, update and rollback various changes in our database schema.
After filling the required fields and adding the dependencies, press Generate and an archive containing the application will be downloaded. After extracting it, you can just open it in your preferred IDE. For this tutorial I used IntelliJ. Before proceeding to writing code, we need to add one more dependency for the Liquibase Maven Plugin in the pom.xml file (the liquibase-maven-plugin is required for running Liquibase commands using Maven). You can configure from pom.xml a custom properties file for Liquibase and the location of the change-log XML file (this can also be done from application.properties):
<plugin>
    <groupId>org.liquibase</groupId>
    <artifactId>liquibase-maven-plugin</artifactId>
    <version>4.20.0</version>
    <configuration>
        <propertyFile>db.changelog/liquibase.properties</propertyFile>
        <changeLogFile>db.changelog/db-changelog.xml</changeLogFile>
    </configuration>
</plugin>
Step 2 – Add Liquibase and database related properties
As specified in the previous step, some configurations can also be done from the pom.xml file. In the <propertyFile> tag you can specify a separate file for the Liquibase specific properties in case you want to separate them. In the <changeLogFile> you can specify the location of the main change log XML file. But because we do not have many properties, I will use the bellow application.properties file for everything. If you want to find out more about setting up a local database you can check out spring-setup-database-profiles-jasypt.
#the first two properties are telling Spring to print the executed SQL to the console
#in a readable format.
spring.jpa.show-sql=true
spring.jpa.properties.hibernate.format_sql=true
#used for not allowing Spring to create the database from the model annotation as
#everything will be done through Liquibase
spring.jpa.hibernate.ddl-auto=none

#spring boot will automatically run and apply the changes from the spring.liquibase.change-log location
#on startup
spring.liquibase.enabled=true
#specifies the location of the main changelog file that will contain all the scripts/change sets
spring.liquibase.change-log=classpath:db/changelog/db-changelog.xml

#database information properties
spring.liquibase.driver-class-name=org.postgresql.Driver
spring.liquibase.url=jdbc:postgresql://localhost:54432/liquibase_migration_docker
spring.liquibase.user=codingestion
spring.liquibase.password=1234
spring.jpa.properties.hibernate.dialect=org.hibernate.dialect.PostgreSQLDialect